Fix Your Dripping Tap In 5 Easy Steps - Here's How!

A dripping tap is not only annoying but can also be incredibly wasteful. But don’t worry – you don’t have to call a plumber or spend hours trying to figure out how to fix it yourself! In this article, we will show you 5 simple steps on how to easily fix a dripping tap in no time!
What is a Dripping Tap?
Step 1: Identifying the Source of the Problem
Step 2: Finding the Right Tools for the Job
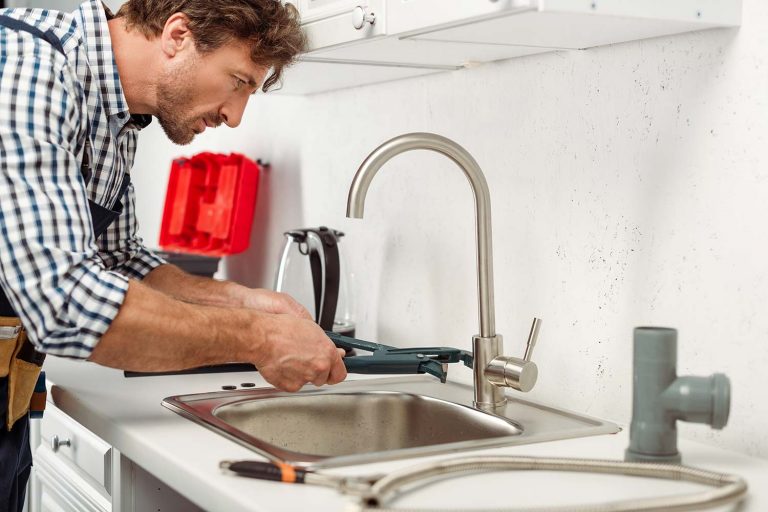
There are a variety of tools you’ll need to fix your dripping tap, depending on the type of tap you have. For most taps, you’ll need an adjustable wrench, pliers, and a screwdriver. If your tap has separate handles for hot and cold water, you may also need a hex key.
Once you have the necessary tools, it’s time to turn off the water supply to your tap. You can usually find the shut-off valve under your sink. Once the water is turned off, open up the tap to release any remaining water pressure.
Now it’s time to disassemble your tap. This will vary depending on the type of tap you have, so consult your user manual or do a quick Google search for instructions specific to your model. In most cases, you’ll need to remove the handle, escutcheon plate, and packing nut before getting to the valve seat.
Once you’ve reached the valve seat, use a brush or cloth to clean away any debris that may be causing your leak. If the seat is damaged or corroded, it may need to be replaced. This is usually a simple process that just requires unscrewing the old seat and screwing in a new one.
If everything looks good at this point, reassemble your tap and turn on the water supply. Test out your repair by turning on the tap and checking for leaks.
Step 3: How to Fix the Tap
If your tap is dripping, the first thing you need to do is identify the cause. If the problem is a loose washer, you can simply tighten it with a wrench. If the problem is a more serious issue, such as a broken valve seat, you may need to replace the entire valve.
Once you’ve identified the cause of the problem, follow these steps to fix your dripping tap:
1. Turn off the water supply to your taps. This will prevent any further damage from occurring.
2. Use a wrench to remove the tap’s handle. Be careful not to strip the threads as you remove it.
3. Inspect the washer and/or valve seat for damage. If they are damaged, replace them with new ones.
4. Reassemble the tap, making sure everything is tight and secure.
5. Turn on the water supply and test your tap to make sure it’s no longer dripping.
Step 4: Testing the Fix
Once you’ve replaced the washer or o-ring and put the tap back together, it’s time to test your fix. Turn on the water supply to the tap and turn the handle to the ON position. If your tap is still dripping, then you may need to replace the valve seat. If your tap is no longer dripping, congratulations! You’ve successfully fixed your dripping tap!
Step 5: Sealing Up & Finishing Off
Once you have replaced the washer and tightened up the nut, it’s time to put everything back together. First, screw the tap back on tightly. Then, turn on the water at the mains and check for leaks. If there are any leaks, simply tighten up the relevant nuts a little more. Finally, turn on your taps and check that they are working properly.
If you have followed these steps correctly, your dripping tap should now be fixed!
Conclusion
In conclusion, fixing a dripping tap is not as hard as it may seem. With the right tools and some patience, you can easily get your leaking tap back in working order with just five simple steps. So next time you find yourself dealing with a leaky tap, don’t hesitate to try out these helpful tips! You’ll be glad that you did when you’re done and have saved money from avoiding an expensive repair bill.
Seek professional plumbing assistance for kitchen tap repair.
If you require professional help for kitchen tap repair in Wellingborough or nearby or if you have a plumbing emergency in Wellingborough or nearby, please call Normz Plumbing at 01933 384 684 or contact us via email or contact form here.
You can also get in touch with us via Facebook or Instagram.
Normz Plumbing & Heating Services has years of experience installing and repairing all kinds of taps and more specifically Kitchen Taps for homes and businesses throughout Northamptonshire including:
Recent Post
Is Your Kitchen Tap Making You Sick? The Hidden Dangers of Germs!
Is Your Kitchen Tap Making You Sick? The Hidden Dangers…
How To Find A Water Leak: 9 Ways To Detect Leaking Water Problems Quickly And Easily
How To Find A Water Leak: 9 Ways To Detect…
What Clients Think About Us?
We guarantee your satisfaction with any plumbing service we provide. If you’re not happy, we’ll return to you and fix it exactly to your satisfaction.


